Step by step DIY melt and pour soap guide
The easy and safe handling allows you to fully focus on the soap design and is therefore a perfect activity for kids as well. In our step by step guide you will learn the basics about melt and pour soap and you will be able to make your first soaps.

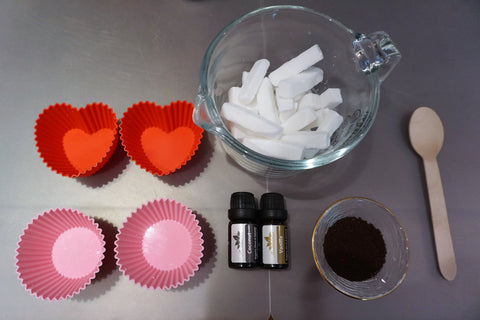
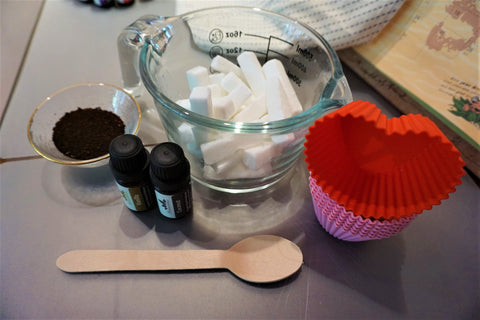
You need:
- Melt and pour soap basis
- Fragrance oils, essential oils
- Colorants (Optional)
- Heat safe container and spatula
- Silicone molds
- Other dry ingredients as you wish (take care about our advice in the details below!)
- Melt and pour soap base: There are several options to choose from when selecting a base. We suggest starting with some simple clear or white melt basis. The clear base will have more bright colors, while the white will have more pastel colors. After you got some experience you can also try bases with additives like goat milk, shea butter, or even aloe vera.
White soap melt base or milk soap base is a perfect match for our vanilla coffee soap.
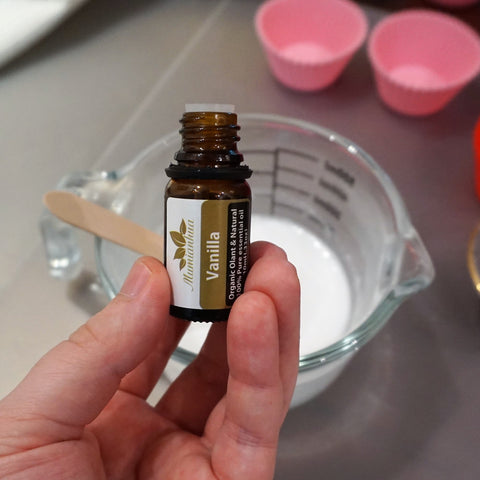
- Fragrance oils: For the best results you should scent your soap with fragrance oils, aroma oils or essential oils. A general usage rate is about 2 ml of oil per 100 g of soap. It’s important to use skin-safe oils and to make sure not to expose undiluted oils to your skin.
For the vanilla coffee soap we are using a blend of 50% Vanilla Oil and 50% Coconut Oil.
- Colorants: You have plenty of options for coloring melt and pour soap. You can get soap colorants either as powder or blocks. Both are easy to handle and perfect for your soaps. Make sure to use dedicated soap or bathing colors only. Using food coloring or any other kind of colors will most likely lead to fading colors or even color bleeding, leaving stains everywhere.
As we are going to use ground coffee, we are not adding any further colorants to our vanilla coffee soap.
- Other ingredients: You can basically add any dry ingredients as dried herbs or flower petals to your soap. Make sure that those are fully dried, otherwise you might get an issue with mold. Also expect the colors of your ingredients fade, a bright blue petal might end up as a slight pastel blue petal.
Never ever use any fresh ingredients like fruit puree or milk. They will grow mold or turn rancid after very few days already, the same as any fruit puree or milk will do if you leave it open for several days. Such ingredients can only be used in cold or hot processed soaps, never in melt and pour soaps. But don’t worry, you can also buy soap basis, which has been made with milk or fruits, so you can just use those for your soaps.
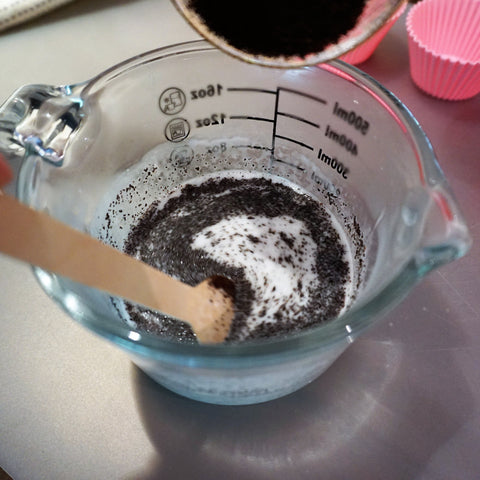
In this recipe we are using used ground coffee. After brewing the coffee, we just dried it in the sun for several days (you can also use your oven for drying). The ground coffee gives a nice aroma and is like a natural peeling. By the way: Did you know that used dried coffee ground is also a great fertilizer for outdoor plants? So, instead of throwing it away you can perfectly upcycle it.
- Molds: It’s important to use heat safe molds. Furthermore, they should be easy to peel off to prevent you break the soap when removing from the mold. We prefer to use silicone baking molds, as they are obviously heat proof and having a non-sticky surface.
Let's get started!
Safety notice: Although melt and pour soaps are the safest way to make your own soaps, you still need to pay attention to safety. The soap basis is melting at around 50°C so you need to make sure to use heat safe equipment only. Please also pay attention to the proper handling of essential oils and colorants, especially if you have kids around. Make sure to cover your working surface for easy cleaning in case you spill some soap.
Preparation
- 200g soap base
- 2 ml Aurascent Vanilla Oil
- 2 ml Aurascent Coconut Oil
- 1 Tablespoon dried ground coffee
1st: Place the soap base into a heat safe container and put it in the microwave. Give it a 30 seconds burst and check the result. If the soap is not fully molten, just put it again into the microwave for another 30 seconds. Continue this till the base is completely liquified.
Of course you can also use a water bath to heat the container, but the microwave offers the fastest and safest handling.

2nd: Stir the liquid soap and add the fragrance oils continuously. Make sure to stir well to have an even scent distribution.
3rd: Measure the temperature of the soap with a thermometer. As soon as the temperature falls somewhere between 50°C and 55°C you can add the ground coffee. Make sure to stir continuously to avoid any partial hardening.
In case you don’t have a thermometer, you can also just monitor the liquid soap. The cooler it gets, the thicker it becomes. When your soap gets a puree like consistence its ready for the ground coffee.
Don’t add the coffee to early. If the soap is too runny, the ground coffee will just sink to the bottom of the soap, so you need to make sure to have a thick liquid, before you can add the coffee.

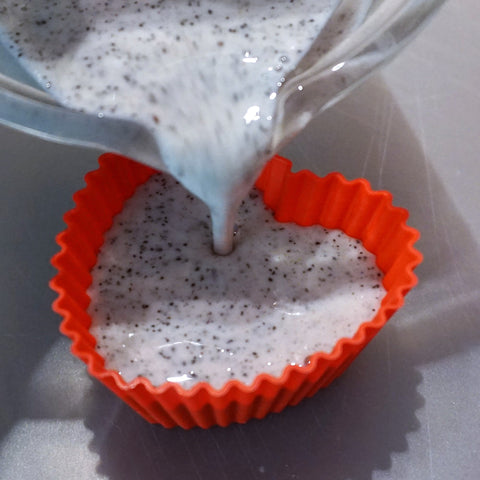
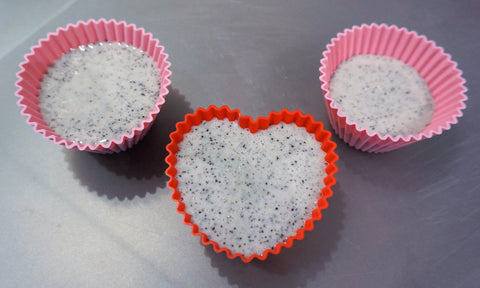
4th: pour the soap into the molds and let them cool down for several hours or overnight. Afterwards you can remove it easily from the mold. Make sure to wrap it into cling foil in case you don’t use it right away.
Now you should be ready for your first DIY soaps, so try it out!